


DIY Drain Repair and Replacement: A Comprehensive Guide for Homeowners
Key Takeaways
| Takeaway | Description |
|---|---|
| Preparation is Key | Assemble the right tools and safety gear before starting. |
| Know Your Drains | Understanding the types and components of your drainage system is crucial. |
| Steps for Repair | Identify the issue; use a plunger or a snake; consider disassembling the P-trap. |
| Steps for Replacement | Remove the old drain; install the new one with proper sealing and tightening connections. |
| Maintenance Matters | Regular cleaning and precautions can prevent future drain problems. |
| Call the Pros When Needed | Seek professional help for complex issues or system-wide problems. |
| DIY Can Be Eco-Friendly | Opt for sustainable practices and materials when repairing or replacing drains. |
| Empowerment Through DIY | Taking on drain repairs can save money and improve your home’s value. |
Introduction to DIY Drain Repair
For DIY enthusiasts, there’s a certain pride that comes with tackling home repair jobs independently. One of the most rewarding and cost-effective DIY projects you can take on is drain repair or replacement—a task that may seem daunting at first, but with the right knowledge and tools, is quite manageable. We, at DrainFixProshttps://drainfixpros.com, want to ensure that you’re informed and prepared to handle these tasks with confidence.
Before diving into the process, it’s essential to understand what this project entails. Drain repair can involve unclogging, fixing leaks, or addressing damage that doesn’t require the drain to be completely replaced. On the other hand, drain replacement is necessary when the drain system is beyond repair due to extensive damage or deterioration. Both require a good understanding of your home’s drainage system, which we’ll explore in the next section.
Understanding Your Home’s Drainage System
When it comes to home maintenance, getting to know how your home’s drainage system works is half the battle. Knowledge of the system can not only help you troubleshoot issues but also prevent them from occurring in the first place.
Overview
| Component | Function |
|---|---|
| Main Drain | Removes waste and water from the home. |
| Vent Stack | Regulates air pressure in the plumbing system and removes gas and odors. |
| Clean-out | Provides access for cleaning and clearing out blockages. |
Your home’s drainage is a complex network designed to dispose of waste water efficiently and hygienically. It typically consists of sink drains, toilets, showers, and appliances like washing machines, all connected to the main drain that exits the home.
Types of Drains
Your drainage system is comprised of various types of drains, each suited to different fixtures:
- Sink Drains: Found in kitchens and bathrooms, equipped with traps to prevent sewer gases from entering the home.
- Floor Drains: Commonly located in basements and laundry rooms; these lie flush with the floor to remove standing water.
- Toilet Drains: Specifically designed to handle sewage and paper waste from toilets.
Understanding the different types of drains in your home is crucial for proper maintenance and repair. For a deeper dive into the intricacies of residential drains, consider our comprehensive guide Understanding Residential Drains.
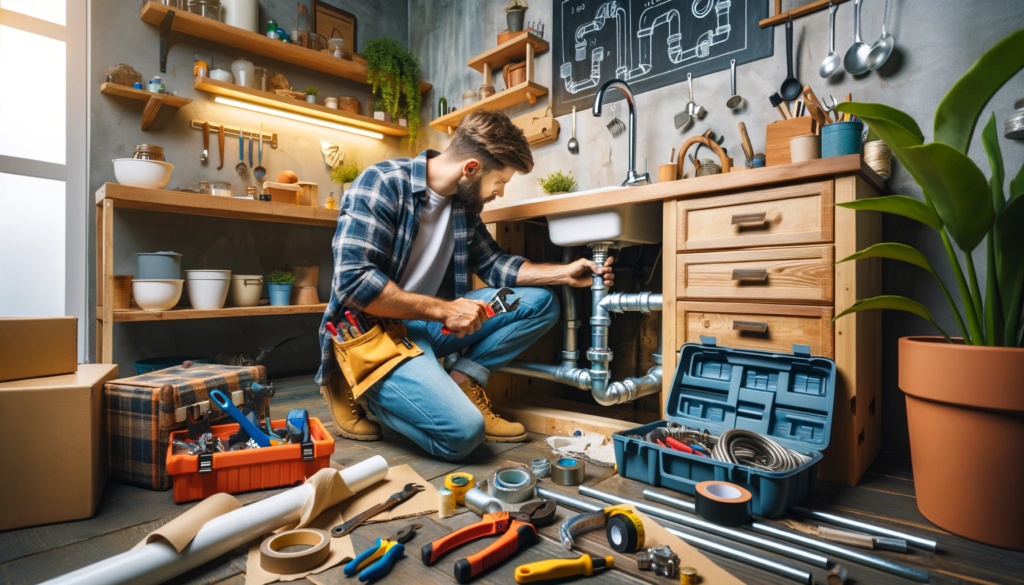
Preparation for Drain Repair or Replacement
Embarking on any DIY project requires some preparation. When it comes to drain repair and replacement, getting your ducks in a row is paramount for a smooth process.
Tools Needed
Equipping yourself with the proper tools is the first step. Here’s what you’ll typically need:
- Adjustable wrenches
- Plumber’s tape
- Pipe cutters or hacksaw
- Plunger and plumber’s snake
- Safety gear: gloves, goggles
- Bucket and towels for spill management
- Pipe fittings and joint compounds (as applicable)
Safety Precautions
Safety is not just a suggestion; it’s a priority. Here are some safety tips to keep in mind:
- Always turn off the water supply before beginning work.
- Use safety goggles and gloves to protect against sharp tools and hazardous materials.
- Keep the area well-ventilated, especially if you’re working with any chemicals.
- Read manuals carefully for any specific tools you’re using for the first time.
Step-by-Step Guide: Repairing a Drain
DIY drain repair can often be straightforward if the problem is minor. Let’s walk through the steps.
Identifying the Issue
First, you need to pinpoint the problem with your drain. Common issues include:
- Clogs from hair, grease, or foreign objects.
- Leaks, which might occur at joints or because of cracks.
- Slow drainage, which usually indicates a partial blockage.
Fixing Common Problems
Once the issue is identified, here’s how you can address it:
For Clogs:
- Use a plunger to attempt clearing the blockage.
- If unsuccessful, try a plumber’s snake to dislodge the clog.
- For stubborn clogs, you may need to remove the P-trap under the sink to clear it out directly.
For Leaks:
- Tighten connections with a wrench.
- Apply plumber’s tape or epoxy to seal minor cracks.
- Replace damaged pipe sections if necessary.
For Slow Drainage:
- Regularly use a natural drain cleaner like a mix of baking soda and vinegar.
- Ensure proper ventilation of your pipes.
- Regularly remove any debris that might start accumulating.
When tackling these projects, it’s vital to have detailed instructions and guides handy. For a more in-depth tutorial on installation, we have an excellent resource on DIY Drain Installation.
Step-by-Step Guide: Replacing a Drain
If your drain has reached the point of no return, it may be time to replace it. Fear not! With our guide, we’ll make sure you have all the information and steps you need to replace old or damaged drains successfully.
Removing the Old Drain
Disassembling outdated drainage is the first step in the replacement process:
- Assess the current setup, noting down how everything is connected.
- Gently remove fittings and connections with a wrench or pipe cutter.
- Carefully detach the old drain from the sink, tub, or toilet base.
Installing a New Drain
With the old components out of the way, let’s proceed to install the new drain:
- Prepare the new drain, ensuring that it’s the correct type and size.
- Place plumber’s putty or a gasket around the new drain flange.
- Secure the new drain into the sink or bathtub, attaching it to the drainage pipe.
- Tighten all connections, verifying there are no leaks.
Maintenance Tips to Prevent Future Issues
Regular maintenance is key to ensuring your drains remain in good working order. Here are some tips to keep your drains running smoothly:
- Regularly clean stopper assemblies and P-traps to prevent buildup.
- Use strainers in sinks to catch debris and hair before it enters your drains.
- Avoid disposing of grease, coffee grounds, and other clogging agents down the sink.
- Perform a bi-annual maintenance check on all your house’s drains.
For more in-depth maintenance advice, check out Drain Maintenance Tips.
When to Seek Professional Help
We fully support the DIY spirit, but we also recognize that some jobs require a professional touch. Here’s when you should consider calling in the pros:
- When multiple drains in your home are affected, this could indicate a more serious system-wide issue.
- If you’ve tried multiple fixes and the problem persists.
- For installation or repair of main sewer lines, it’s best to ensure the job is handled by a licensed professional.
For help with emergency situations or for when DIY just won’t do, learn about your options in Emergency Drainage Solutions.
FAQ About DIY Drain Repair and Replacement
When embarking on DIY projects, questions are bound to arise. Here are some frequently asked questions to assist you along the way:
- How do I know if my drain should be repaired or replaced?
- If your drain has minor clogs or slow drainage, repairs might be sufficient. However, if there’s significant corrosion or multiple leaks, replacement might be the best option.
- Can I replace a section of drain pipe myself?
- Yes, if you’re comfortable using tools like pipe cutters and can follow safety protocols, you can replace a section of drain pipe. Be sure to measure twice and cut once!
- What are some signs of drainage problems?
- Water backing up in sinks or bathtubs, gurgling noises from drains, and water stains on walls or ceilings can all be signs of drainage issues.
- Is it environmentally friendly to repair or replace drains myself?
- DIY repair and replacement can be eco-friendly, especially if you use sustainable materials and avoid harsh chemicals. Check out Eco-friendly Drain Solutions for more information.
Conclusion: Empowering Homeowners
In conclusion, DIY drain repair and replacement are within your grasp as a homeowner. With the right tools, a clear understanding, and a bit of elbow grease, you can manage your home’s drains efficiently, save on costs, and gain the satisfaction of maintaining your home independently. We’ve shared plenty of information to help you on this journey, and remember, we’re always here to help with more resources and advice to keep your home’s drainage in top condition.
Embarking on DIY projects to improve your home not only enhances your living space but can also contribute positively to the overall value of your property. Learn more about how good drainage can affect your home’s appeal and worth in Drainage and Home Value.
Thank you for following along. If you’re ready to tackle your drain repair or replacement project, go forth with confidence, equipped with the knowledge we’ve shared. And should you need to, don’t hesitate to reach out to a professional for those more complex issues. Here’s to your success as a DIY drain repair and replacement hero!