


An Instructional Guide to DIY Drain Installation
| Key Takeaways | Description |
|---|---|
| Accurate Planning | A clear checklist and necessary tool guidance ensure a well-prepared starting point for your project. |
| Step-by-Step Instructions | Detailed descriptions provide clarity on each phase of the installation, minimizing errors and rework. |
| Common Issue Avoidance | Proactive problem-solving tips to prevent and address common installation challenges. |
| Long-Term Maintenance | Maintenance strategies to sustain the health and functionality of your drain system over time. |
| Emergency and Adaptation Know-How | Solutions for unexpected issues and adaptations for different home types and landscapes. |
| Foundation Protection | Insight into how proper drainage safeguards your home’s structural integrity, with red flags to monitor. |
| DIY Empowerment | Encouragement and guidance to advance DIY skills and improve your home through personal effort and care. |
Brace yourself for an in-depth exploration of the art and science behind DIY drain installation. With attention to detail and practical advice at every step, this guide is your companion in transforming a daunting task into an achievable project. Let’s initiate this journey with the fundamental understanding and preparations.
Introduction to DIY Drain Installation
Imagine extending the life of your home, protecting its structural integrity, and customizing its functionality—all with your own two hands. DIY drain installation might sound complex, but it’s a skill within your reach. Whether you’re aiming to install a new kitchen sink drain or overhaul your home’s entire drainage system, this guide promises to navigate you through the entire process methodically.
By the time we’re done, you’ll not only know how to lay pipes and create effective drainage but also how to make informed decisions about maintenance, materials, and methods. You’re not just going to install a drain; you’re going to ensure that your home is fortified against the elements with a system built to last.
Tools and Materials Required
The foundation of any successful DIY project lies in the right set of tools and materials. Let’s uncomplicate this first stage by reviewing the essentials that you’ll need to gather before kicking off your drain installation project.
Tools You Can’t Do Without:
- A level for ensuring your pipes slope correctly—a crucial aspect for proper water flow.
- A plumber’s snake for those inevitable moments when you need to unclog a testy drain.
Pro-tip: Invest in a good-quality plumber’s tape. It’s often overlooked, but this little hero can help prevent leaks at threaded joint connections.
Materials Make or Break Your Project:
- PVC, ABS, or metal pipes? Your choice of piping is critical. PVC is widely popular due to its durability and ease of use, but you might have specific code requirements in your area.
- Sealants and compounds: You’ll need these to secure your joins and make the system watertight. Silicone-based sealants are generally preferred, thanks to their flexibility and water-repelling properties.
A quick list for reference:
- Piping (PVC or ABS, depending on local codes)
- Pipe fittings (elbows, T-joints, couplings)
- PVC primer and cement (for PVC installations)
- Pipe wrench
- Hacksaw (for cutting pipe)
- Plumber’s putty or sealant
- Gloves and safety goggles
By combing through these foundational selections, you set the stage for a smoother installation process. But remember, high-quality materials paired with the right tools are only half the story—the real magic happens in the planning and execution.
Understanding Residential Drains
Before one can stride into the realm of installations and repairs, a solid grasp on the types and purposes of residential drains is paramount. Drains may be inconspicuous but play a critical role in the health of your home’s environment, so picking the right one is key.
Types of Drains and Their Uses:
- Toilet Drains: These carry away sewage to the main sewer or septic system and require careful installation to prevent backflows and clogs.
- Shower and Bathtub Drains: Typically equipped with traps to capture hair and soap scum, they require regular maintenance to keep the water flowing smoothly.
Understanding the nuances of each type and where they’re most effectively used will dramatically improve the functionality of your installation. For example, a floor drain in a laundry room might require a different approach compared to a French drain in your garden.
Strategic Considerations:
- Location: The placement of a drain is as crucial as the drain type itself. Certain areas may accumulate more water, requiring more robust solutions.
- Accessibility: Ensuring drains are accessible for cleaning and repair will save you a lot of trouble down the line.
Visit Understanding Residential Drains for more information on residential drains.
Planning and Designing Your Drainage System
Now comes the cerebral part of the project: planning and designing your drainage system with a vision that aligns functionality with foresight. This phase is as much about proactive thinking and innovation as it is about preparation and careful calculation.
Blueprints and Beyond:
- Begin with your home’s blueprint to outline potential drainage routes and water collection points.
- Consider natural water flow and aim to work with, not against, it. The goal is to guide water away from the house to prevent any potential water damage.
Advanced Planning Points:
- Climate considerations: Areas with heavy rainfall might need wider or additional pipes.
- Future Landscaping: If you have plans to transform your outside space, ensure that your drainage system won’t be disrupted.
A well-conceived plan will act as the roadmap to a functional drainage system, foreseeing and maneuvering around potential issues before they arise. The next steps of our guide will ensure you’re ready to tackle the installation head-on, focused and informed.
Pre-installation Checklist
Preparing for a drain installation isn’t wildly dissimilar to charting out a complex journey; it begins with a meticulous checklist ensuring every step is planned for and every tool is on hand. Skimping here isn’t an option – trust me, preparation is the scaffolding of a successful DIY drain installation.
Here’s what needs to be on your checklist:
- Confirm no conflict with utilities: Call before you dig. Hitting a water line or, worse, an electrical line, can halt your project or put you in danger.
- Secure the necessary permits: Yes, even DIY projects may require a municipal nod of approval. It’s best to stay on the right side of local regulations.
- Safety first: A hard hat, gloves, and goggles are your friends. Protecting oneself from unforeseen mishaps isn’t paranoia; it’s common sense.
With your equipment, permissions, and safety gear ready, you’re almost at the starting blocks. The actual groundwork, quite literally, is next.
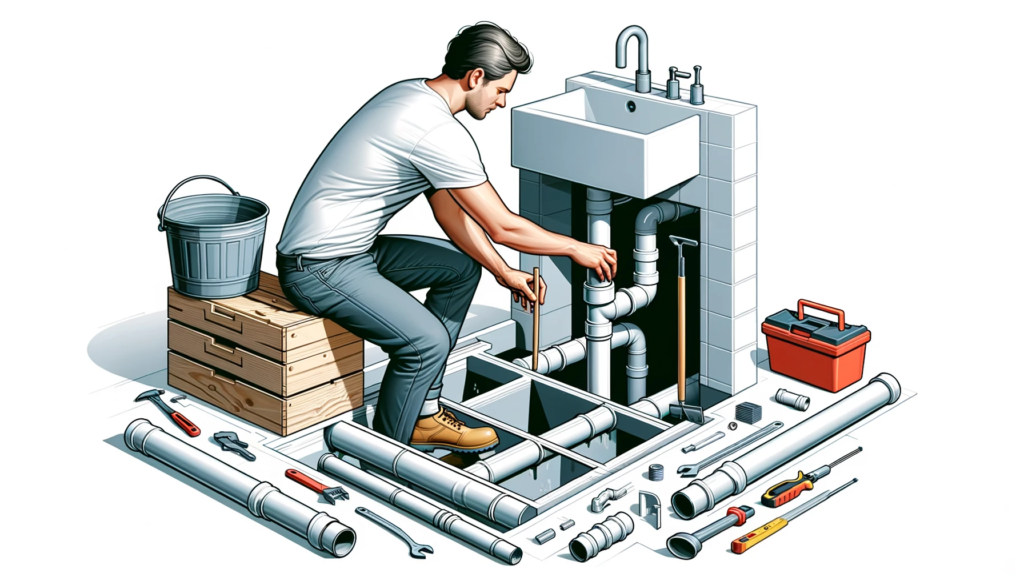
Step-by-Step Guide to Installing the Drain
Marking and Excavating
- Route Mapping: Before your shovel touches the soil, use spray paint or garden stakes to map the drain route meticulously. It’s crucial to maintain a clear visual of your planned pathway.
- Strategic Trenching: The trench needs to be consistent in depth and gradient. Use your level throughout the digging process. A solid rule of thumb for the gradient is a 1% slope, or a drop of 1 inch for every 8 feet of length. This helps water flow naturally and prevents any standing water in your pipes.
- Soil Considerations: Different soil types present unique challenges. Sandy soil, for instance, may require a sturdier retaining method to prevent collapse before the pipes are laid.
- Underlayment: Placing a layer of landscape fabric in the trench can help prevent soil and roots from penetrating the pipes over time.
Laying the Pipes
- Cutting to Size: Measure twice, cut once. Ensure your pipes are cleanly cut to the correct length with a pipe cutter.
- Dry Fitting: Before any permanent fixes are made, lay out the pipes and fittings to ensure a perfect fit. This allows you to make any necessary adjustments without the pressure of the glue drying.
- Gluing Method: For PVC piping, start with the primer before the cement. Apply both to both surfaces: the outside of the pipe and the inside of the fitting. Insert the pipe into the fitting with a slight twisting motion to ensure an even spread of glue. Hold in place for a few seconds to prevent the pipe from pushing out as the cement sets.
- Maintaining the Slope: Continuously verify the pipe slope as you glue. A string level can assist with this across longer distances. Deviations can lead to poor drainage and sediment buildup.
- Adding Clean-Outs: Strategically place access points to make future unclogging and maintenance easier. They should be accessible yet discreetly out of the way.
Testing Before Finalizing
- The Initial Flush: Once the cement has cured, conduct an initial flush with a hose or bucket. Look for any water escaping from fittings, indicating leaks.
- The Coverage Test: Partially backfill the trench with gravel and run a larger volume of water through the pipes. This tests the piping under near-normal conditions.
- Observation: Watch how the water exits. Ideally, you should see a steady, free-flowing exit from the endpoint. Tailing water or dripping indicates problems that need addressing before finalization.
Once these steps are completed without concern, proceed to cover the pipes fully with gravel, then backfill with soil, compacting firmly as you go.
Each step in this guide is essential, providing structure to the process and preventing missteps that might lead to extensive rework. If you are all set, we can proceed to elaborate on the common problems and maintenance aspects of your DIY Drain Installation.
Common Problems and How to Avoid Them
Even the most meticulously planned projects can encounter hiccups. Here’s how to sidestep some commonplace issues that might crop up and ensure your drainage project is pristine from the start.
Leaky Connections
Problem: If pipes aren’t joined properly, they can leak. Water seeping through these joins can undermine the entire system.
Prevention:
- Thorough Cleaning: Ensure the pipe ends and fitting insides are wipe clean before applying any primer or glue.
- Proper Gluing: Use the right type of cement and don’t skimp on it—apply it to both surfaces being joined. Smooth any excess cement with your finger to ensure a seal without gaps.
Poor Slope
Problem: If the slope is incorrect, water might pool in the pipes, leading to sediment build-up and reduced efficiency.
Prevention:
- Regular Checks: As you lay each section of piping, don’t just guess—use a level or laser to ensure accuracy.
- Back-check: After laying a few sections, go back and check previous sections to confirm the slope hasn’t shifted during the work.
Soil Erosion Backfill
Problem: Backfilling with the wrong material can cause sediment to enter your drainage system or can compress the pipes over time.
Prevention:
- Gravel Layer: Start by backfilling the trench with a layer of gravel. Not only does it help maintain pipe positioning, but it also facilitates water flow away from the pipes and can filter out sediment.
- Geotextile Fabric: Consider wrapping your pipes in geotextile fabric for added protection against finer particles.
Recognizing when a challenge surpasses your expertise is important. If you find yourself stuck, consider consulting a pro – here’s when to do it: Choosing a Drainage Contractor.
Drain Maintenance Tips
Installation is just the beginning. Maintaining your drainage system is what will keep it at peak performance for years to come.
Routine Checks
- Regular Inspections: At least once a year, do a thorough check. Look for visible signs of wear and test water flow to catch blockages early.
High Pressure Flushing
- Hydro Jetting: Annually, or as needed, flush the drain system with high pressure. This can clear out debris build-up and ensure the system is flushing cleanly.
Natural Cleaners
- Enzyme-Based Cleaners: Use enzyme-based cleaners rather than chemical ones. They work by breaking down organic material naturally and are less harsh on your pipes. Plus, they’re better for the environment.
Access Points
- Ensuring Easy Access: If you included clean-outs in your system (and you should have), make sure they’re easy to reach. When you need to get in there for maintenance, you’ll thank yourself.
With an eye on longevity, these maintenance tips can help you stave off any significant problems. Now, the final touch is ensuring you’re equipped for those unexpected emergencies—let me guide you through essential emergency preparedness next.
Emergency Drainage Solutions
Even the best-maintained systems can encounter emergencies. Being prepared with the right tools and knowledge can make the difference between a quick fix and a full-blown crisis.
Immediate Response Kit
Keep a kit handy with these essentials:
- Pipe repair clamp: This can temporarily seal small leaks until you can perform a permanent fix.
- Plumber’s epoxy: For quick, temporary patches on cracked pipes.
- Heavy-duty plunger and plumber’s snake: For unclogging without resorting to chemical drain cleaners.
Quick Temporary Fix Strategies
- Patch: Apply plumber’s epoxy over small leaks or cracks as a temporary measure.
- Clamp It Down: Use a pipe repair clamp to restrict water flow around a troubled area on the pipe.
Knowing how to employ these emergency measures can buy you the time you need to arrange for a more comprehensive repair, minimizing the potential damage caused by leaks or blockages.
Adapting the Installation to Various Types of Homes
Every home has its quirks, and these can dictate special considerations during a drainage project. Here’s how to navigate the peculiarities that can arise with different types of homes.
For Older Homes
- Investigate existing materials: You may deal with legacy materials like cast iron. Adapt your methods to work with these older systems.
- Retro-fitting: Rather than a full replacement, sometimes adding to or adapting the older work to new requirements can be effective.
For Challenging Landscapes
- Topography Tuning: Homes built on slopes or in low-lying areas need to factor in natural water paths.
- Creative Solutions: Sometimes a standard drain won’t fit the bill, and you’ll need to investigate options like a sump pump or dry well.
Keeping your system compatible with your home’s design and landscape can prevent many potential headaches. Tailor these tips to suit the unique needs of your abode.
With the preventative and emergency measures laid out, it’s clear that a successful DIY drain installation isn’t just about putting pipes in the ground—it’s a continuous commitment to maintenance and adaptability. If you are ready, we can wrap up with some final thoughts on the importance of your project for your home’s long-term health and how you can protect this significant investment.
The Importance of Drainage for Home Foundation Health
Your home stands steady and secure thanks to the solidity of its foundation. Ensuring this foundation remains uncompromised is largely influenced by the effectiveness of your drainage system.
Why Proper Drainage Matters
- Foundation Integrity: Water is a foundational enemy. Ensuring that your drainage system efficiently removes excess water protects the foundation from weakening due to water exposure.
- Preventing Settlement and Cracking: Homes without proper drainage can experience uneven settling, leading to cracks not only in the foundation but throughout the structure.
Recognize the Signs
- Pooling Water: This can indicate that your drainage system isn’t handling runoff efficiently.
- Foundation Cracks: While small cracks are normal as a house settles, larger fissures can indicate significant problems.
- Dampness and Mold: These suggest that moisture is making its way into places it shouldn’t be, potentially undermining your home’s structure.
Keeping an eye on these danger signals and addressing them promptly can save not only substantial repair costs but can prevent your home from suffering long-term damage.
Concluding Thoughts on DIY Drain Installation
Congratulations! You’ve reached the end of this comprehensive guide to DIY drain installations. You’re now equipped with the know-how to not only undertake this crucial home improvement project but also understand the reasons for each step and the importance of regular maintenance.
As your tools lie cleaned and ready for their next use, it’s essential to observe your handiwork in action over time. A successful DIY drainage project isn’t simply about a job well done in the moment—it’s about creating a reliable system that stands the test of time and weather, ensuring the health of your home’s foundation for years to come.
Remember: Every house is unique, every system special in its own way, and your touch—your decisions and diligence—embed themselves in the workings of your home. The skills you’ve honed, the mistakes you’ve learned from, and the successes you’ve celebrated are all part of the journey of DIY mastery.
Whether you wield your plumber’s wrench once a year or cultivate a weekend warrior’s zeal for home projects, know this – you have enhanced not only the immediate quality of your living space but also its enduring value.
Now go ahead, pat yourself on the back, and take a moment to appreciate your work. Then grab that checklist for one last review, ensuring every box is ticked, every step is completed, and every effort is made towards sustaining the safe haven that is your home.